Reconfigurable Acquisitions Using Features
What are features?
navigate allows users to reconfigure acquisition routines within the GUI by chaining
so-called “features” together in sequence. A feature is the name given to a single
acquisition unit such as Snap, which snaps an image, or
MoveToNextPositionInMultiPositionTable, which moves the stage to the next imaging
position indicated in the Multiposition Table. Some acquisition units, such as
Autofocus or ZStackAcquisition have a bit more going on under the hood, but can
be used in the same way.
Customizing Feature Functionality in the GUI
Features can be optionally customized within the GUI. For example instead of reprogramming a feature and loading it again, we can swap Python functions in and out of features. This can be helpful, e.g., when you are prototyping a function to automatically detect an object within an image and want to try a few different options.
Loading Custom Functions
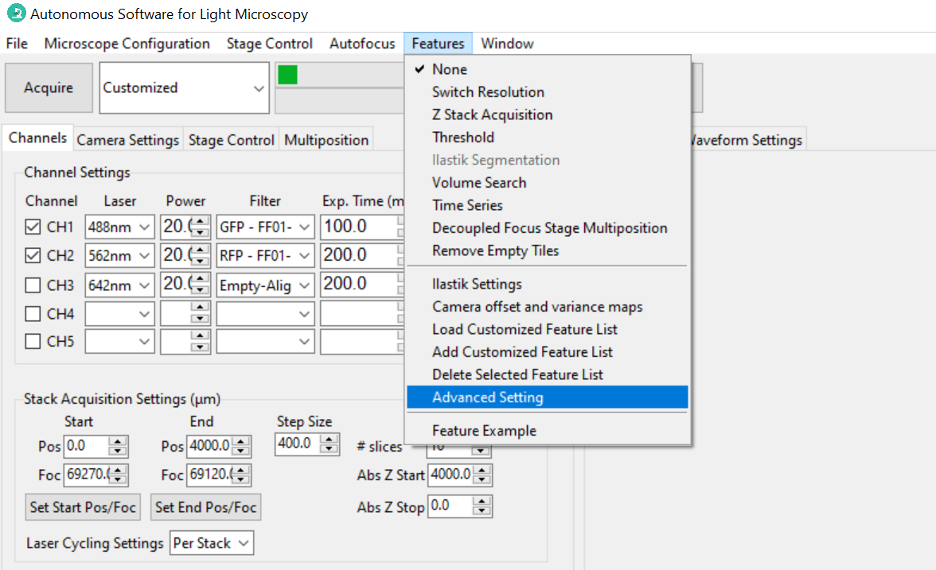
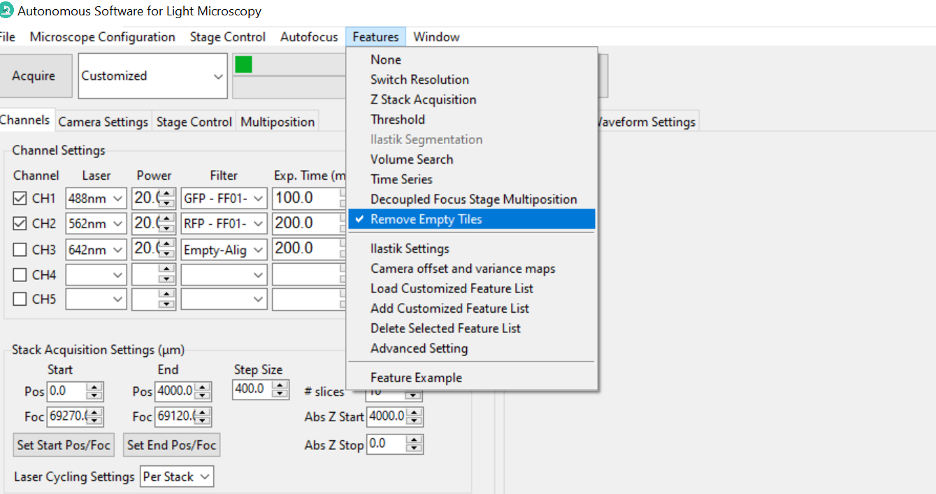
You can load customized functions in the software by selecting the menu .
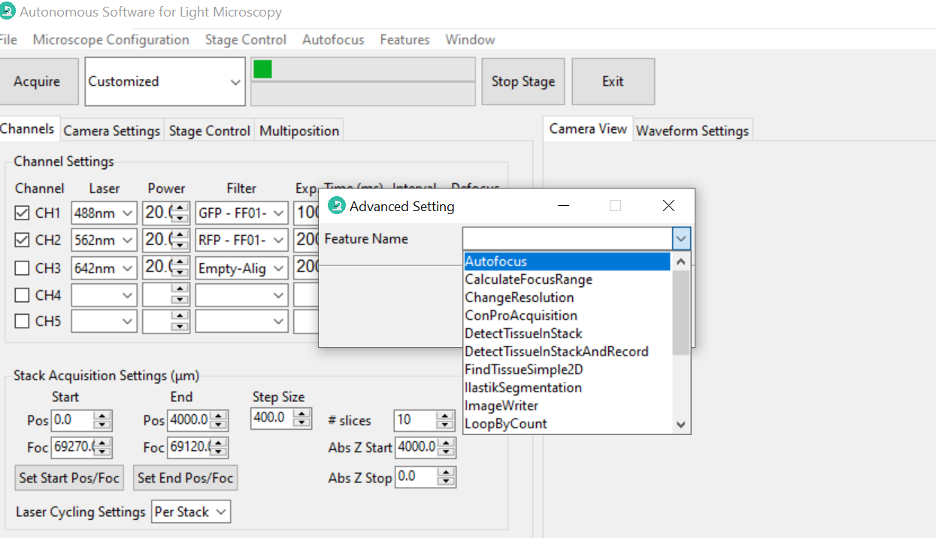
In the Advanced Setting popup window, choose the feature name with which you want to use the dynamic customized functions as feature parameters.
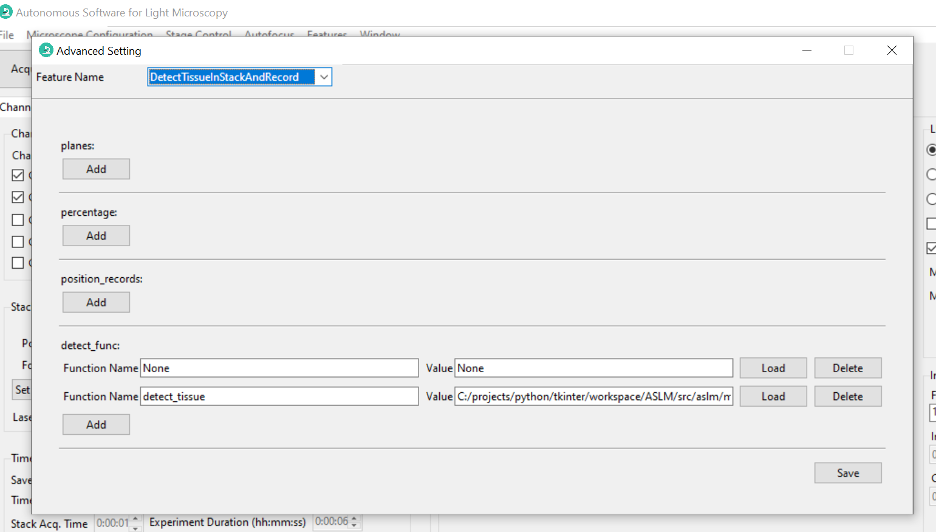
Click Add, A new line will appear and allow you to edit the parameter options. Type the function name which is defined in your python file.
Then click Load to choose your Python file.
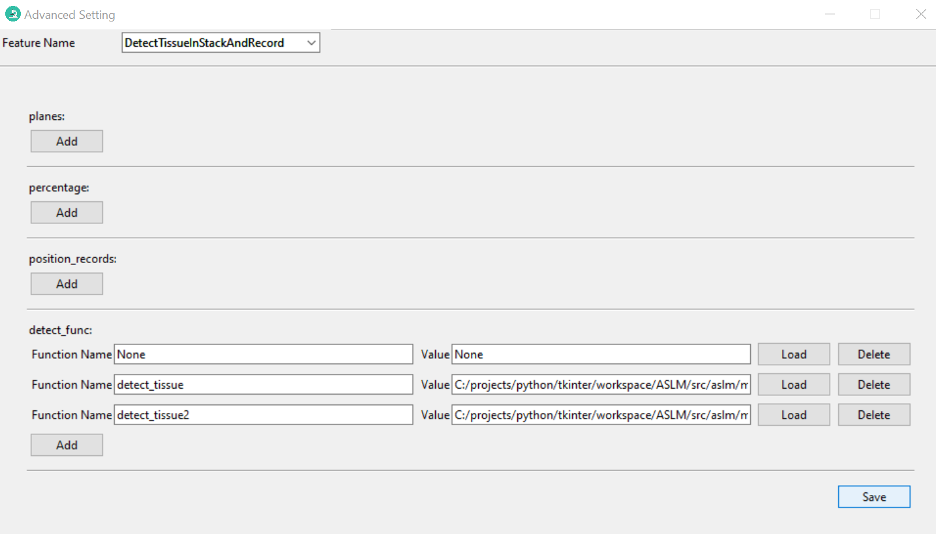
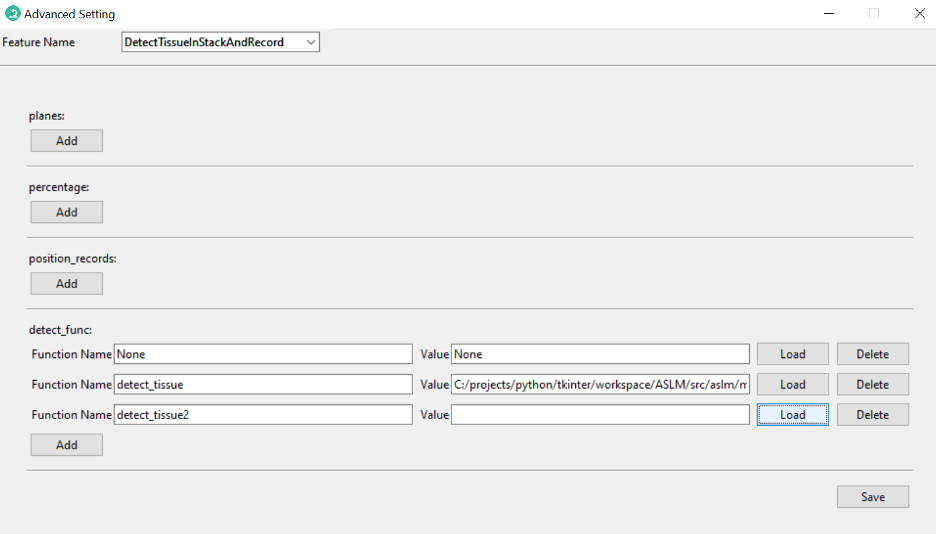
When you run a feature list containing the feature you just set, the new function name will appear and you can choose the one you just added.
Creating a Custom Feature List in the GUI
Once you have loaded your feature list, the next step is to use it in combination with other features to create an intelligent acquisition workflow. To do this, you will need to create a new feature list that combines your custom feature with other features:
Select . This will open a new dialog box that allows you to create a new feature list.
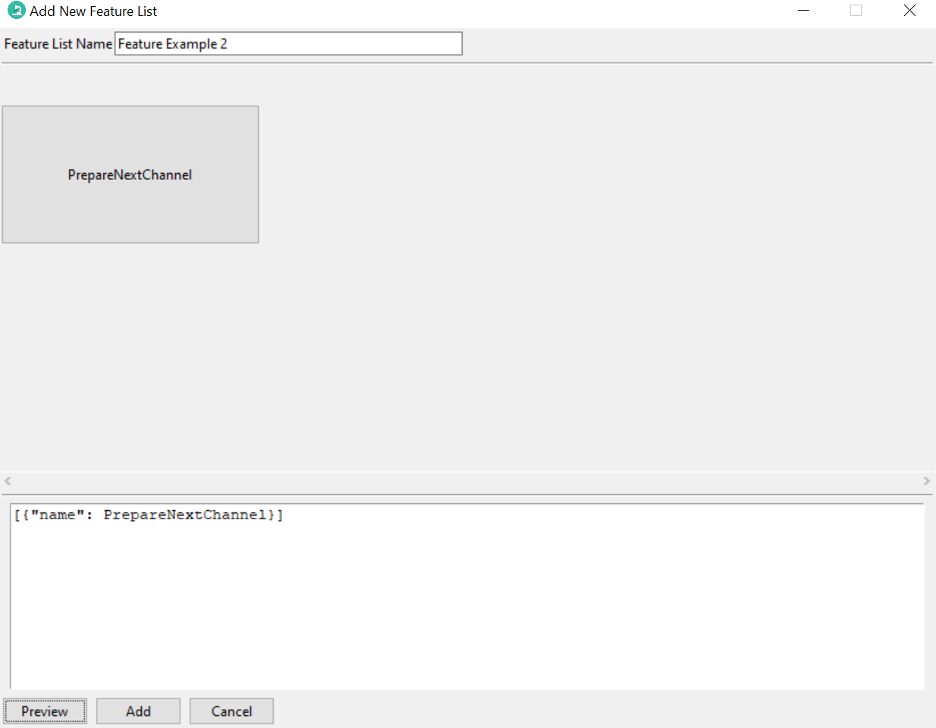
Provide the feature list with a Feature List Name of your choice, and type the feature list content (which must be a list object). The feature list content could be the whole feature list or just a simple feature name. In this example, the feature list name is
Feature Example 2, and the content is a simple feature name:[{"name": PrepareNextChannel}]
Once you select Preview, the feature list will be displayed in the Preview window. If you are satisfied with the feature list, select OK to save it.
You can edit the list of features directly by modifying the text, or through a popup menu that is available by right clicking the feature tile. The popup menu allows you to add a new feature, delete a feature, or edit a feature. In this example, click Insert After, and a new feature
PrepareNextChannelwill be inserted by default.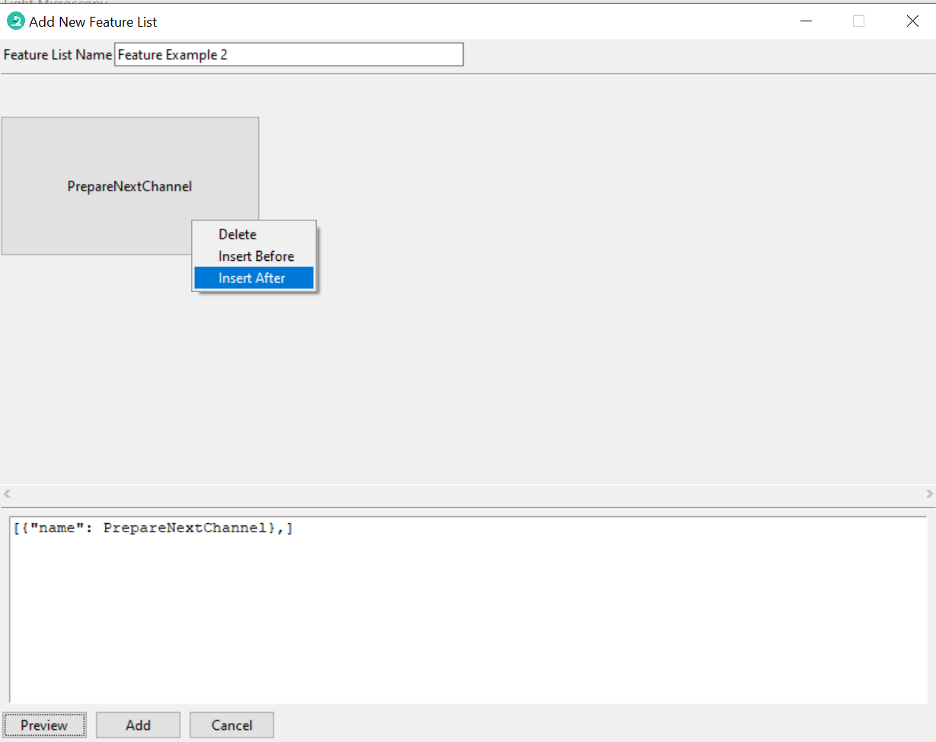
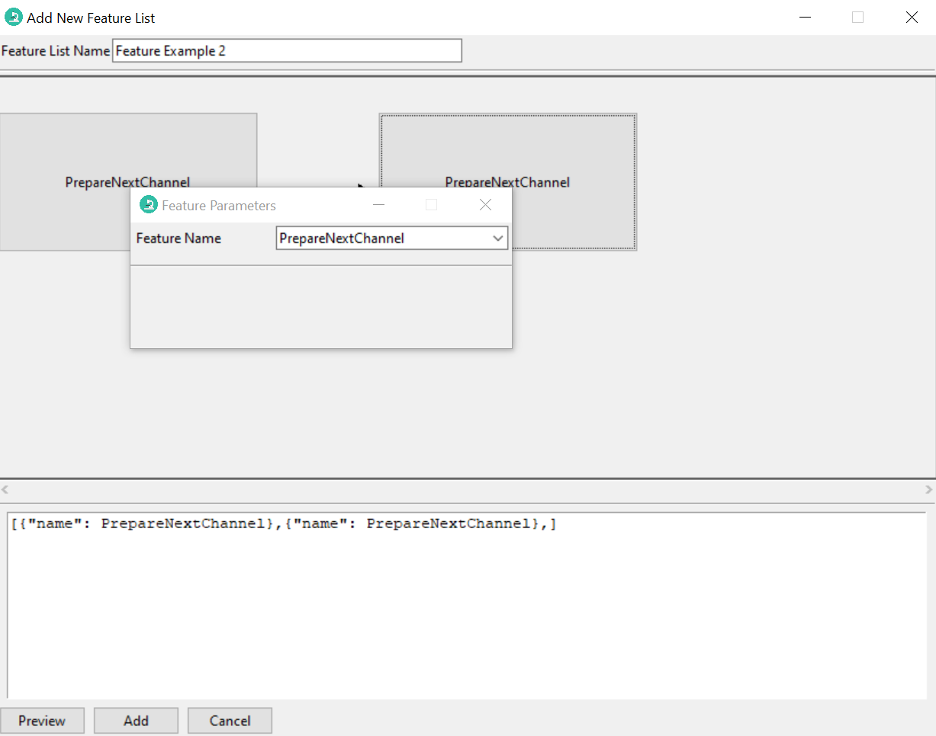
To change the identity of the inserted feature, you can select a different feature form the drop-down menu. For example, the feature can be changed from
PrepareNextChanneltoLoopByCount. The parameters of the feature can be changed automatically in the popup window.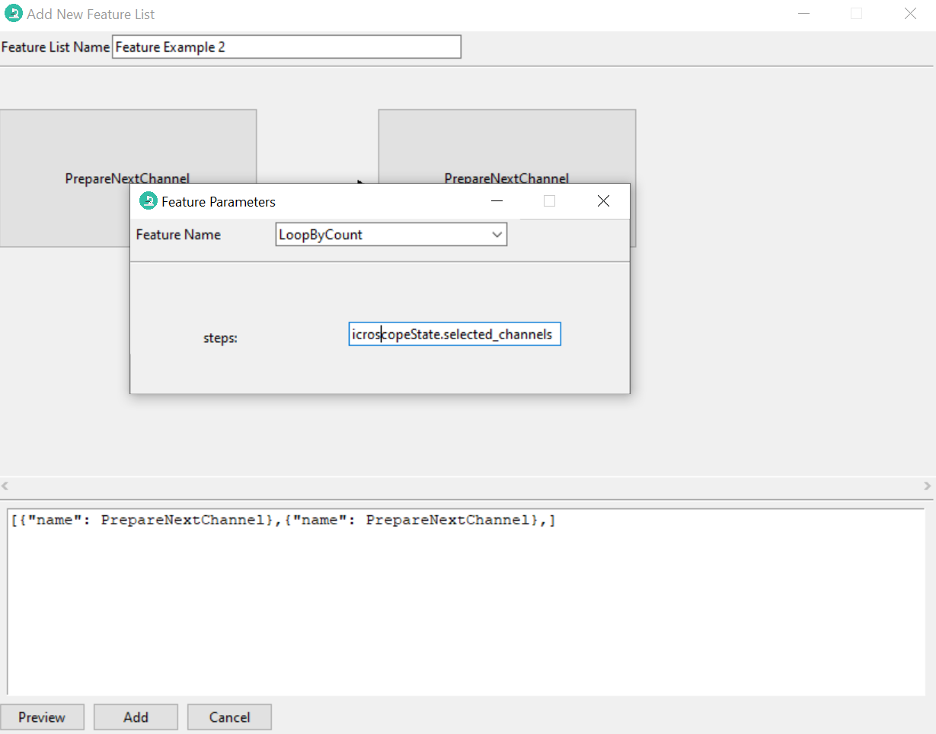
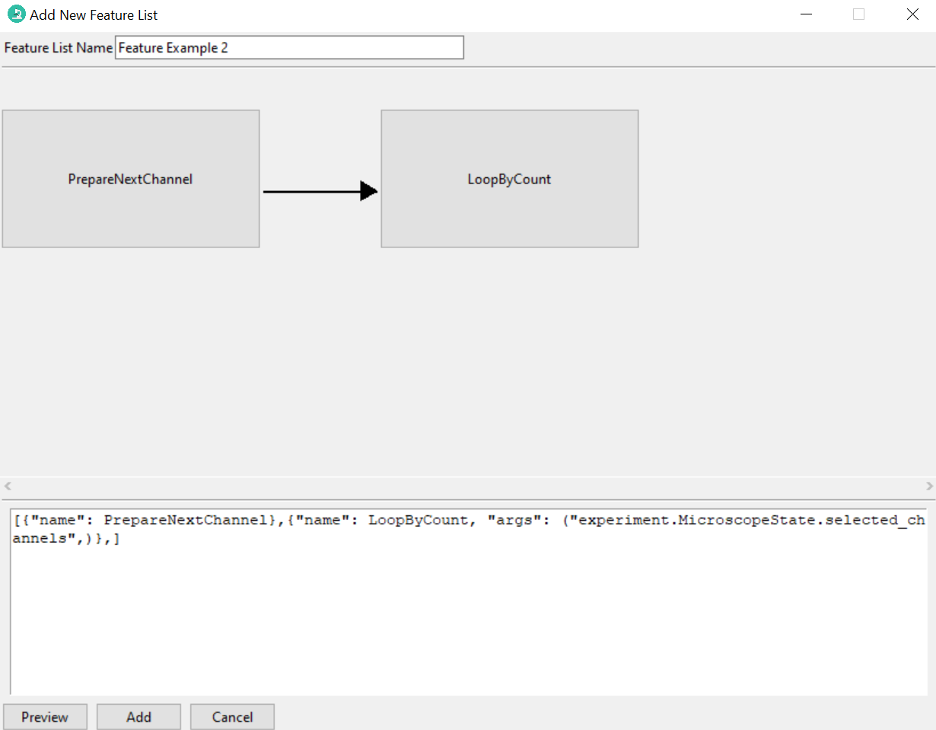
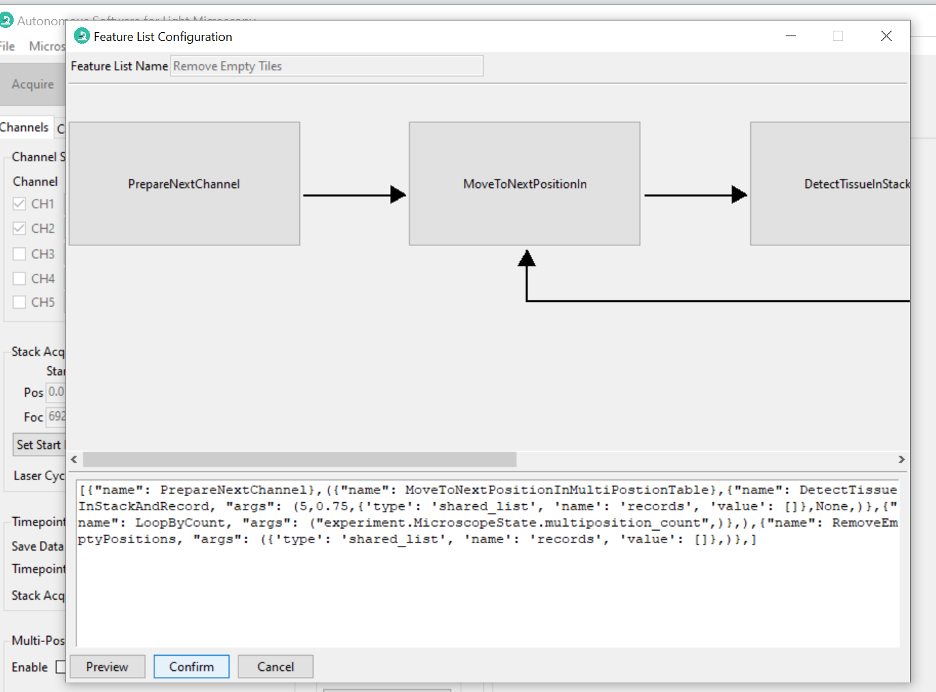
If you click the preview button, a graphical representation of the feature list will be displayed.
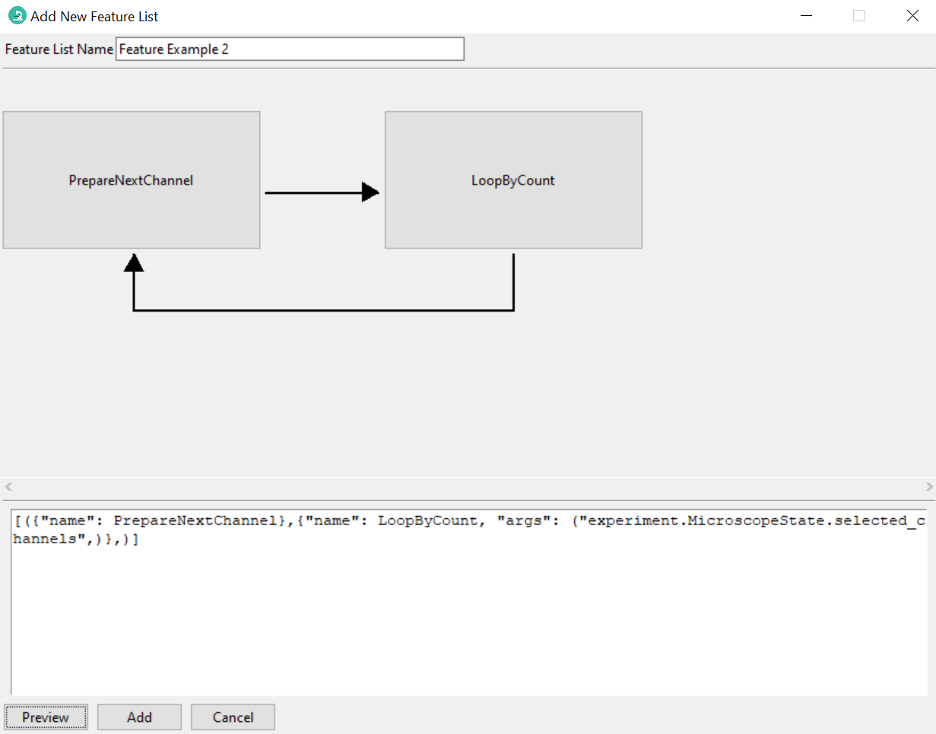
If you want a loop structure, type a pair of parentheses around the features, then click Preview. Given this design, you can loop through arbitrary features in a user-selected format.
After editing the feature list, click Add. The new feature list will show up under the Features menu.
Editing Feature Lists on the Fly
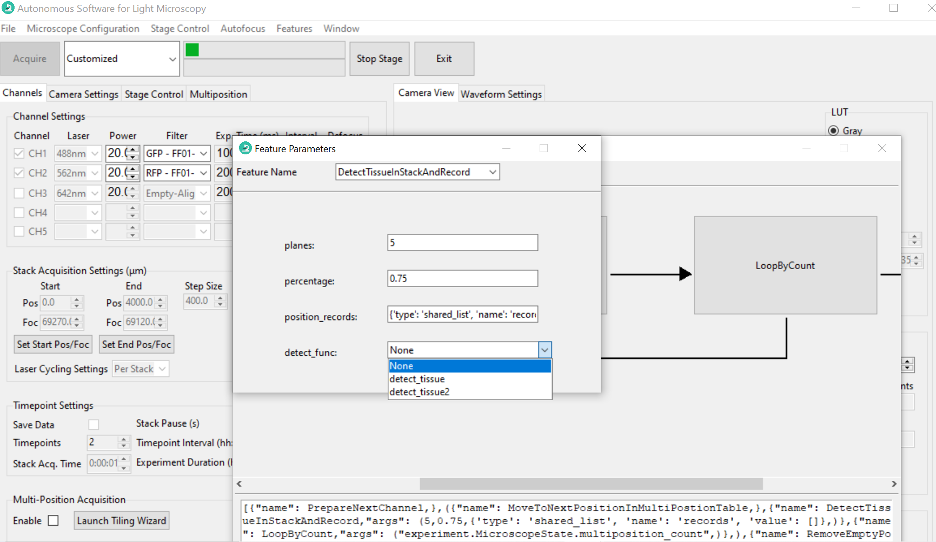
Select the feature list you want to run, choose “Customized” acquisition mode, and then click Acquire. A Feature List Configuration popup window will show up. In this popup window, you can see the structure of the selected feature list.

Click one feature in the preview window, a Feature Parameters window will show up. Then set the desired parameters (e.g., planes in this screenshot). Close the Feature Parameters window.
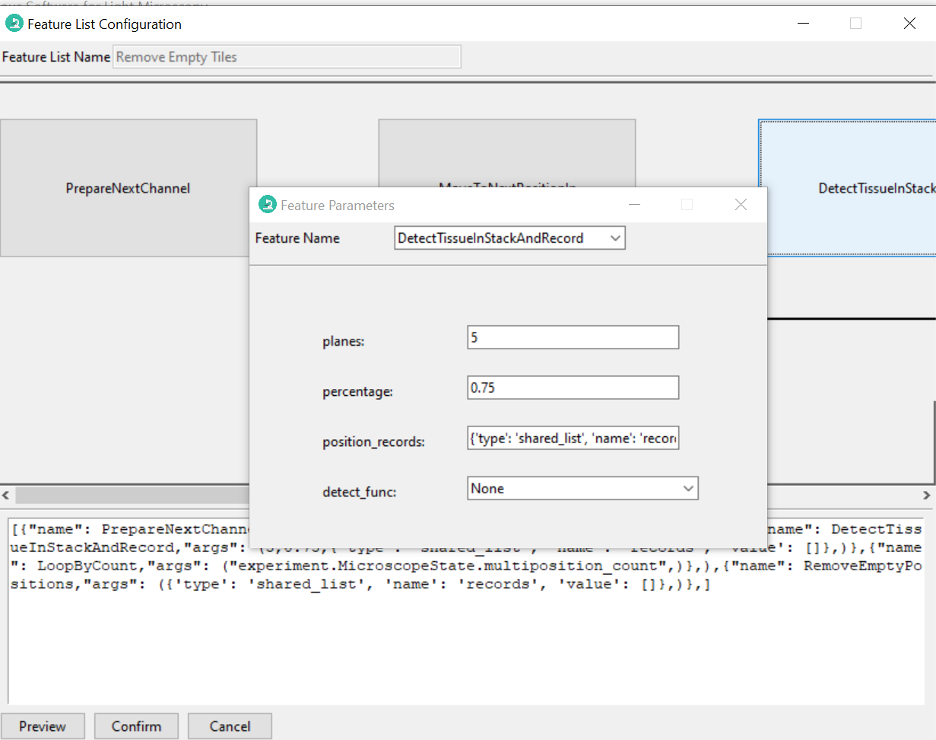
Click Confirm. The feature list will start to run.
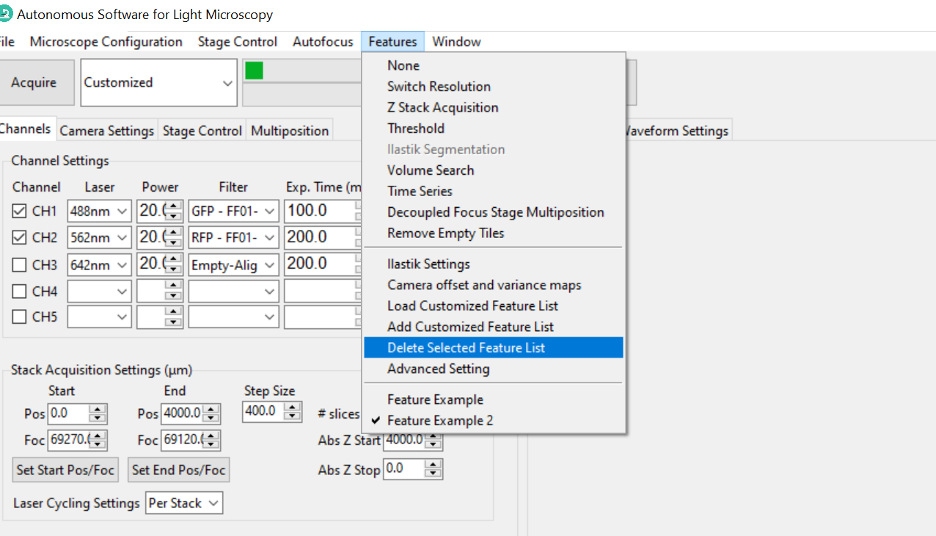
Deleting Feature Lists
Select the feature list you want to delete in the Features menu.
Then, go back to the Features menu and select Delete Selected Feature The feature list will be removed from the menu and the software.
Text Representation of Feature Lists
At the bottom of each of the Feature List Configuration frames above, there is a text box with a textual representation of the feature list. As an alternative to point-and-click editing, a user can update feature lists by editing this textual representation and then pressing Preview.
The square brackets [] create a sequence of events to run in the feature container.
The {} braces contain features. The parentheses () indicate a loop.
As an example, let’s look at the feature list that describes the Continuous Scan mode:
[
  (
    {"name": PrepareNextChannel},
    {
        "name": LoopByCount,
        "args": ("experiment.MicroscopeState.selected_channels",),
    },
  )
]
Here, we have a sequence defined by [] containing one element, a loop, indicated
by the closed parentheses. There are two features within this loop. One feature has the
name
PrepareNextChannel
and the other
LoopByCount.
The parentheses indicate we will keep looping through both of these features until
stopping criteria is met. In this case, the looping will stop when LoopByCount
returns False due to running out of selected_channels to loop through. That is,
it will end once all selected channel have
been imaged.