Smart Acquisition Routines
navigate’s feature container lets you build acquisition routines by chaining existing features into lists. See Currently Implemented Features for the complete list. You can also build additional features as plugins.
One common problem in light-sheet microscopy is wasting time acquiring z-stacks in empty space. With the feature container, you can build a routine that checks for tissue at each position and only acquires z-stacks where tissue is detected. This section walks through building such a routine.
Prerequisites
Before starting this guide:
Complete Software Installation.
Complete Configuring navigate, or launch with navigate -sh to use virtual devices.
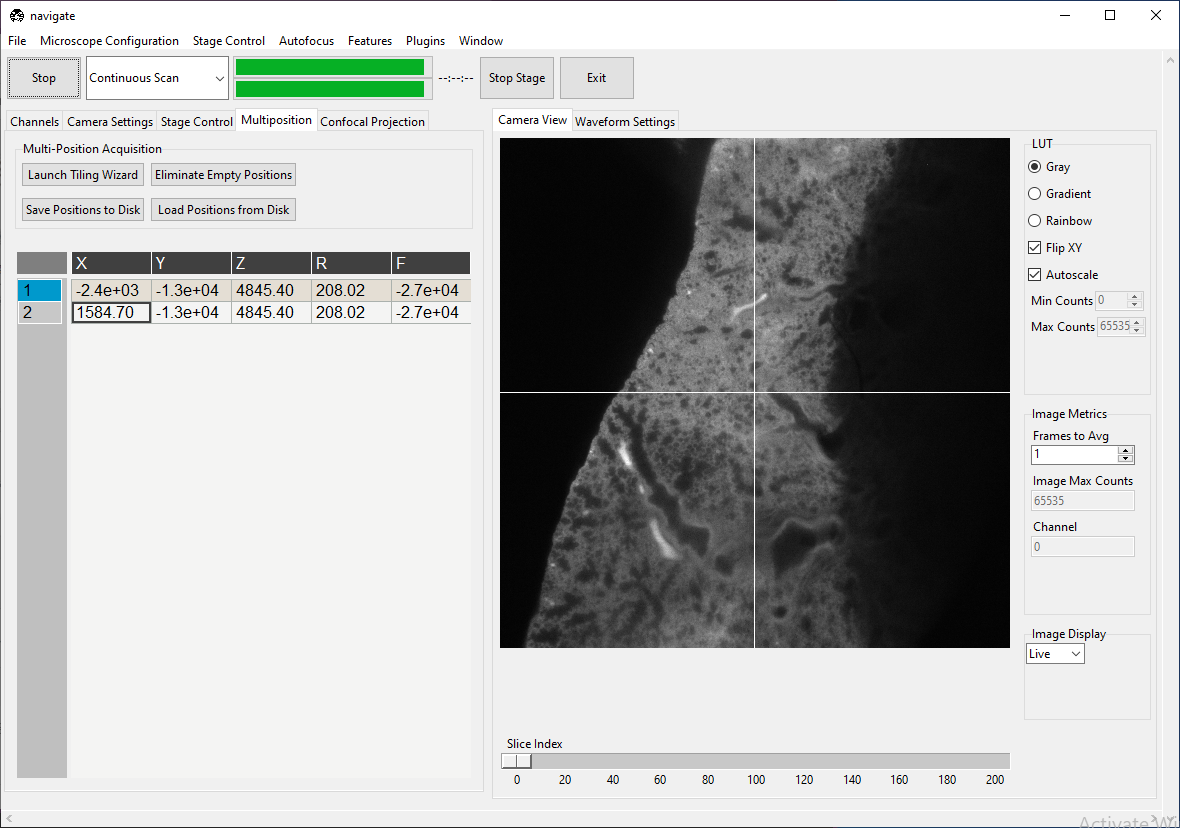
Add at least two entries in the multiposition table so one can represent tissue and one can represent empty space.
Example Setup
The example below assumes two positions in the multiposition table: one with tissue and one without tissue.
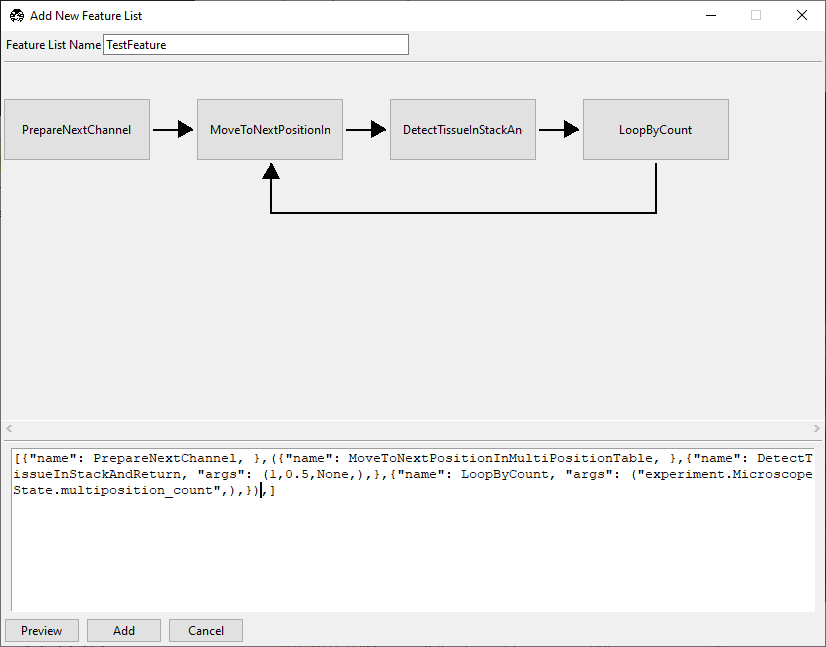
Step 1: Create the Base Feature List
Go to .
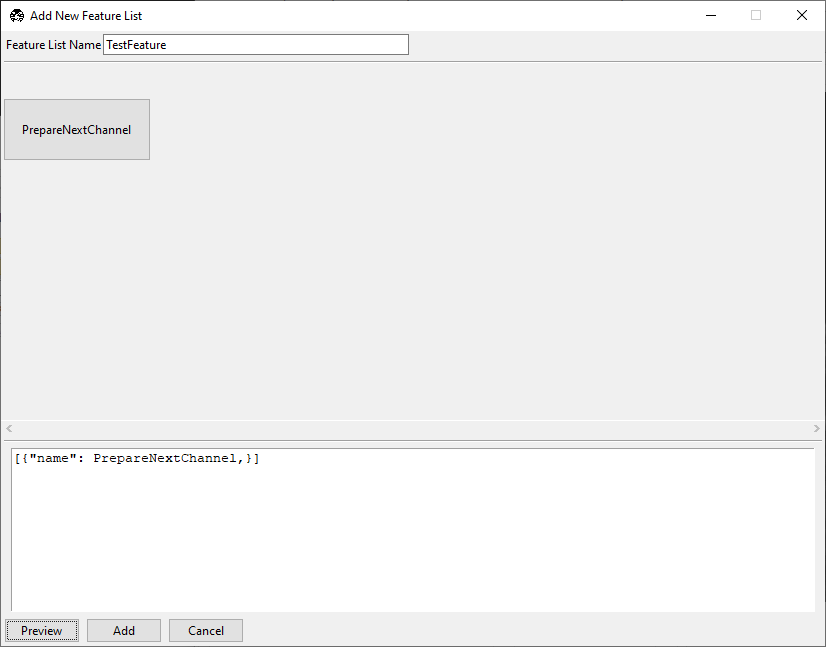
In the Add New Feature List window, enter
TestFeaturein the name field.In the lower editor, enter:
[{"name": PrepareNextChannel}]
Click Preview.
Tip
Checkpoint: the preview should show one node, PrepareNextChannel.
Step 2: Add Position Traversal
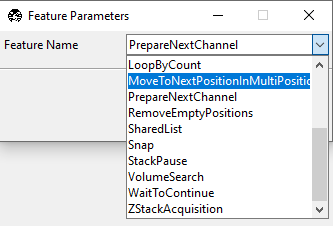
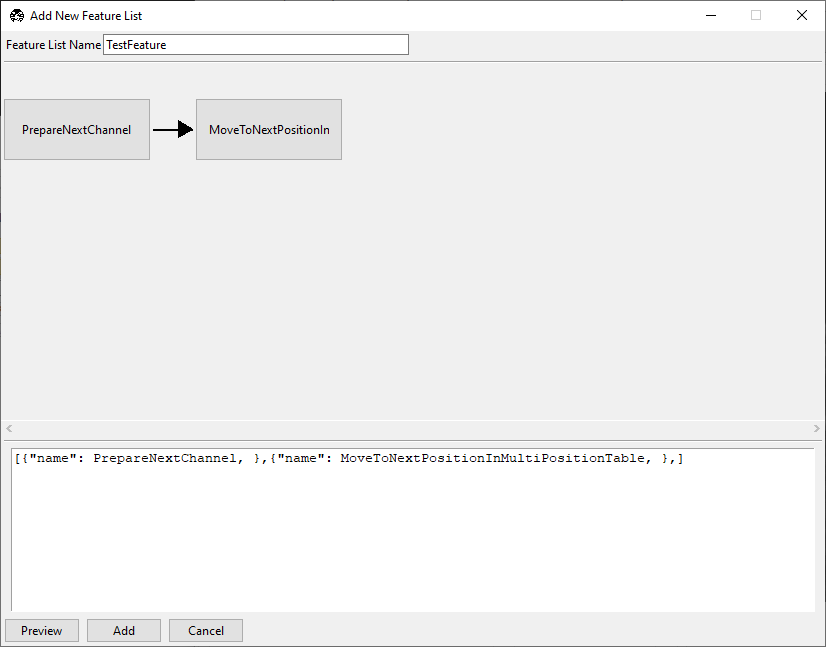
Right-click
PrepareNextChanneland select Insert After.Confirm a second placeholder node appears after
PrepareNextChannel.Click the new node and choose
MoveToNextPositionInMultiPositionTable.

Configure the new node. Here, one can set the resolution_value, zoom_value, and offset.
Close the node selection popup.
Tip
Checkpoint: the routine should now take one image per multiposition entry in the first selected color channel.
Step 3: Add Tissue Detection
Right-click
MoveToNextPositionInMultiPositionTableand select Insert After.Set the new node to
DetectTissueInStackAndReturn.
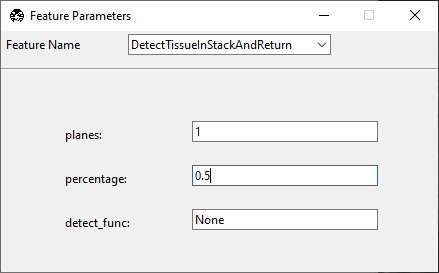
Configure the
DetectTissueInStackAndReturnnode with the following parameters:planes: number of z-planes checked for tissue.
percentage: required fraction of tissue-positive frames in the stack to return
true.detect_func: tissue detection function from remove_empty_tiles. If set to
None, navigate usesdetect_tissue3().threshold: intensity threshold passed to the tissue detection function.
Tip
Checkpoint: the routine now evaluates each position for tissue before deciding what to acquire.
Step 4: Add Loop Control
Right-click
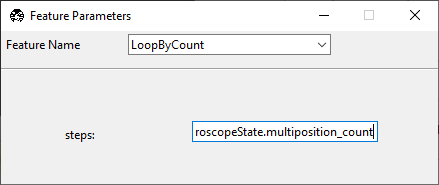
DetectTissueInStackAndReturnand select Insert After.Set the new node to
LoopByCount.Set
stepstoexperiment.MicroscopeState.multiposition_count.Group the repeated section in parentheses
()and click Preview.
Confirm that the displayed routine shows the looped section in the graphical user interface.
Tip
Checkpoint: the repeated segment should be visually grouped as a loop in preview.
Step 5: Convert Tissue Detection to a Decision Node
Add
trueandfalsebranches to theDetectTissueInStackAndReturnnode:
{
    "name": DetectTissueInStackAndReturn,
    "args": (1, 0.5, None),
    "true": [{"name": ZStackAcquisition, "args": (False, False, "z-stack")}],
    "false": "continue",
}
Click Preview.
Click the node to open the decision editor and verify both branches.
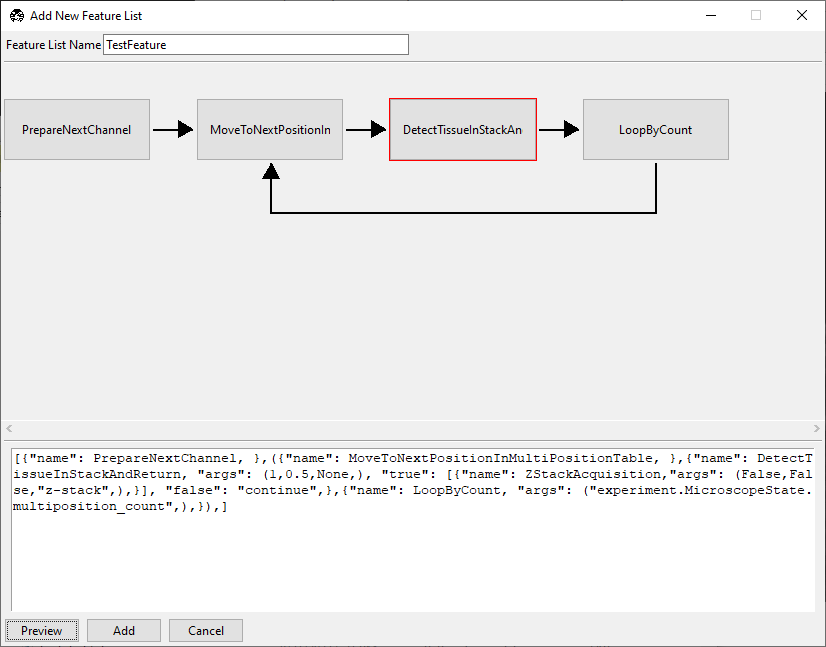
Tip
Checkpoint: DetectTissueInStackAndReturn should have a red border, indicating decision-node behavior.
Step 6: Save and Run the Routine
Click Add in Add New Feature List.
Select .
Set acquisition mode to Customized.
Click Acquire.
For the two example positions above, the software should acquire a z-stack at the tissue position and skip z-stack acquisition at the empty position.
Complete Example
The snippet below is a full, copy-ready template that matches this workflow:
[
    {"name": PrepareNextChannel},
    (
        {"name": MoveToNextPositionInMultiPositionTable},
        {
            "name": DetectTissueInStackAndReturn,
            "args": (1, 0.5, None),
            "true": [
                {"name": ZStackAcquisition, "args": (False, False, "z-stack")}
            ],
            "false": "continue",
        },
        {"name": LoopByCount},
    ),
]
Note
Depending on your feature editor version, the exact argument serialization for LoopByCount may differ. If needed, set the steps field in the GUI to experiment.MicroscopeState.multiposition_count after loading the template.
You can now use this routine directly or adapt it to your microscope’s needs.