Feature Container
navigate includes a feature container that supports reconfigurable acquisition and analysis workflows. The feature container runs a tree of features, where each feature may perform a signal operation (hardware-side actions), a data operation (image-side analysis), or both.
After one feature finishes, dependent features run next (for example, move the stage and then acquire an image), followed by sibling nodes in the feature tree.
Examples include navigate.model.features.common_features.ZStackAcquisition for z-stack acquisition and navigate.model.features.autofocus.Autofocus for focus optimization using a discrete cosine transform.
Feature Objects
Each feature is a Python object that accepts a model reference in __init__() and defines a config_table dictionary that controls runtime behavior. A complete example is shown below. You can include only the entries you need.
self.config_table = {'signal': {'init': self.pre_func_signal,
                                'main': self.in_func_signal,
                                'end': self.end_func_signal,
                                'cleanup': self.cleanup_func_signal},
                     'data': {'init': self.pre_func_data,
                              'main': self.in_func_data,
                              'end': self.end_func_data,
                              'cleanup': self.cleanup_func_data},
                     'node': {'node_type': 'multi-step',
                              'device_related': True,
                              'need_response': True},
                    }
Both signal and data entries are dictionaries that can include init, main, end, and cleanup keys.
initruns before the feature’s main function.mainperforms the primary operation and usually runs once per acquisition step. It returnsTrueto continue andFalseto stop.endruns after a successfulmainstep and can handle boundaries, transitions, and stop checks.cleanupruns on failures and should perform fail-safe shutdown actions (for example, turning off lasers).
The node dictionary controls node-level behavior. node_type can be one-step or multi-step. device_related is set to True when the signal path is hardware-dependent. need_response is set to True when the node must wait for hardware confirmation (for example, waiting for a stage move to complete).
Each function assigned in self.config_table is a method on the feature object.
Creating a Custom Feature Object
Each feature is defined as a class. Creating a new feature follows standard Python class design, with a few requirements:
The first
__init__argument afterselfmust bemodel.Additional arguments should be keyword arguments with defaults.
__init__should always create aconfig_tableattribute (see Feature Objects).
In the example below, we create a feature that moves to a specified position in the multi-position table and computes image sharpness using the normalized DCT Shannon entropy metric.
from navigate.model.analysis.image_contrast import fast_normalized_dct_shannon_entropy

class FeatureExample:

    def __init__(self, model, position_id=0):
        self.model = model
        self.position_id = position_id

        self.config_table = {
            "signal": {
                    "init": self.pre_func_signal,
                    "main": self.in_func_signal,
            },
            "data": {
                    "main": self.in_func_data,
            },
            "node": {
                "device_related": True,
            }
        }
Get multi-position table position from the GUI.
GUI parameters are stored in
model.configuration["experiment"]during runtime. The function below loads the requested table position (position_id) when the feature starts.def pre_func_signal(self): positions = self.model.configuration["experiment"]["MultiPositions"] if self.position_id < len(positions): self.target_position = positions[self.position_id] else: current_position = self.model.get_stage_position() self.target_position = dict([(axis[:-4], value) for axis, value in current_position.items()])
More GUI parameters are defined in experiment.yml.
Use the stage to move to this position.
This step moves the stage to
target_position.def in_func_signal(self): pos = dict([(f"{axis}_abs", value) for axis, value in self.target_position.items()]) self.model.move_stage(pos, wait_until_done=True)
Take a picture and process the resulting image.
In parallel with the signal call, the camera acquires images into
model.data_buffer. Data functions run after image acquisition. In this"main"data function, we compute image entropy.def in_func_data(self, frame_ids): for id in frame_ids: image = self.model.data_buffer[id] entropy = fast_normalized_dct_shannon_entropy(image, psf_support_diameter_xy=3) print("entropy of image:", id, entropy)
This completes a minimal custom feature object.
How to Interact with Other Devices
Interact with devices through self.model.active_microscope. For example, to open the shutter:
self.model.active_microscope.shutter.open_shutter()
How to Pause and Resume Data Threads in the Model
Camera image handling runs in a separate thread. By default, signal and data operations run in parallel and do not block each other. In some workflows, you may need strict ordering. For example, wait_until_done blocks only the signal thread; it does not pause the data thread.
Use this pattern to pause and resume the data thread:
self.model.pause_data_thread()
self.model.move_stage(pos, wait_until_done=True)
# ...
self.model.resume_data_thread()
We can of course replace self.model.move_stage(pos, wait_until_done=True) with whatever task we want to wait for before resuming image acquisition.
Model functions are documented in the API.
Custom Feature Lists
You can chain feature objects into lists to build custom acquisition workflows.
Creating a Custom Feature List in Python
To create a customized feature list, follow these steps:
Import the necessary modules:
from navigate.tools.decorators import FeatureList
from navigate.model.features.feature_related_functions import *
FeatureListregisters the list.feature_related_functionsprovides convenience imports so you can use names such asPrepareNextChannelinstead of full module paths.Create the feature list.
@FeatureList
def feature_example():
    return [
        (
            {"name": PrepareNextChannel},
            {
                "name": LoopByCount,
                "args": ("channels",),
            },
        )
    ]
In this example, the feature list takes one image per selected channel in the GUI.
PrepareNextChannelsets up the channel andLoopByCountcalls this setup once per selected channel.Now, open navigate.
Go to the Features menu.
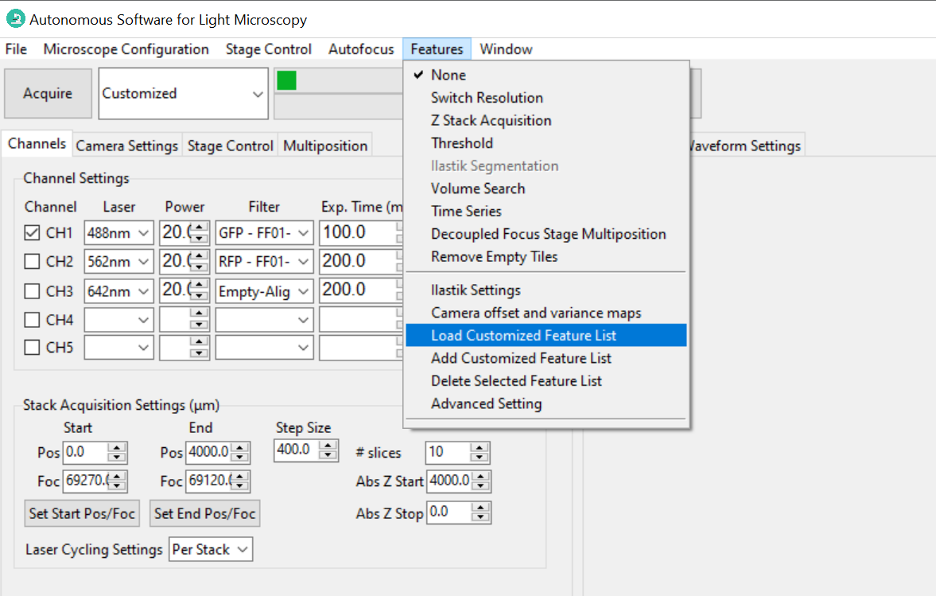
Import the customized feature. Select Add Custom Feature List from the Features menu. A dialog box will appear, allowing you to select the Python file containing your customized feature list function.
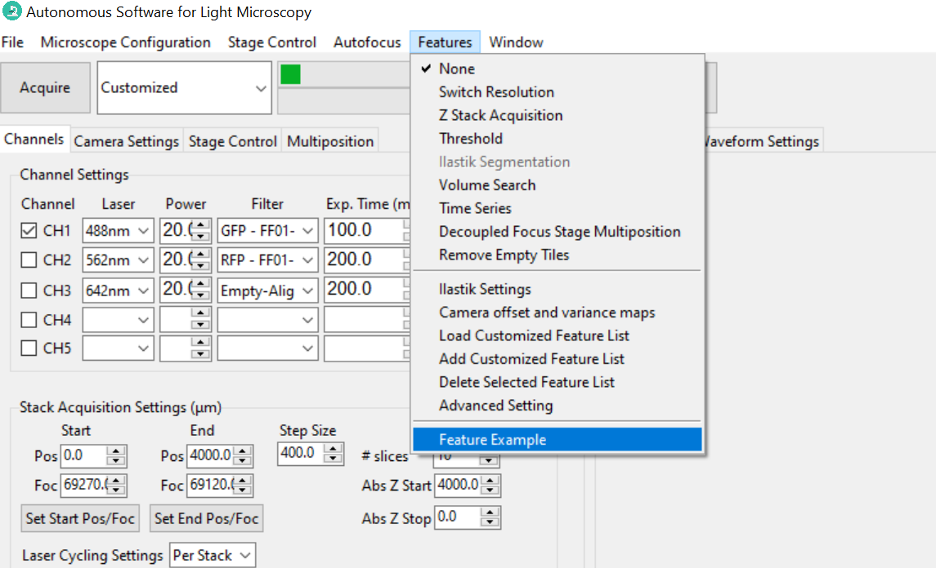
Choose the Python file containing your customized feature list function. navigate will load the specified feature list, making it available for use in your experiments and analyses. It will appear at the bottom of the Features menu.